

Step-by-Step Guide to Getting Started in HubSpot Free
- Grab your portal, do a basic set up (branding, business info, profile)
- Set up your meetings
- Connect your email to the Conversations Inbox
- Add the HubSpot Sales plugin
- Port your website over
- Build out your forms
- Set up privacy protections
- Create your blog

Over the past couple years HubSpot has greatly enhanced their free services. On top of a free CRM, you can now build a website for free, send marketing emails for free, launch chatbot for free, and more.
Like, free free. No charges, no immediate upselling - just free stuff you can use.
I was suddenly laid off in December 2022 and found myself with a lot of free time and a dormant HubSpot consulting business. In other words, I had the bscarter.com domain and that was about it.
I saw this as a good opportunity to practice what I preach and go all-in on HubSpot. Except I don’t have business capital to spend on anything right now.
Here’s how I set up my business on HubSpot in one day without spending a dime.
First, I grabbed a free portal. It’s a quick process - just provide your email plus answer a few questions about yourself (these are primarily for HubSpot's internal segmentation), and you’re in. From that point on, there is a basic tutorial that walks you though the interface.
This is fairly remarkable: I traded an email address and about two minutes for access to a CRM (customer relationship manager) for all my leads and customers plus everything else on HubSpot’s free tier. Most companies will spend thousands just to get a CRM up and running.
Once I was in, I setup my profile, including name, business (and address - this is required to deploy marketing emails), and email. I connected my Gmail and Google Calendar as well, as there are a few tools that utilize those.
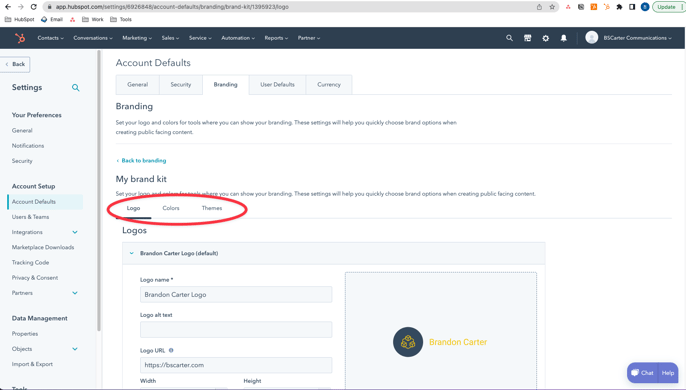
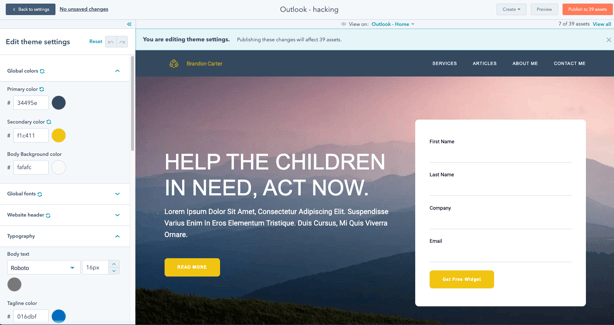
One area I highly recommend setting up first: In the settings, go to Account Defaults and create a Brand Kit. This is where you can upload your logo and set your brand's colors. The logo will be referenced in any web pages or emails you build, and adding the brand colors makes them quickly referenceable as well (no need to keep up with Hex Codes!)
Setting up a Meeting Link
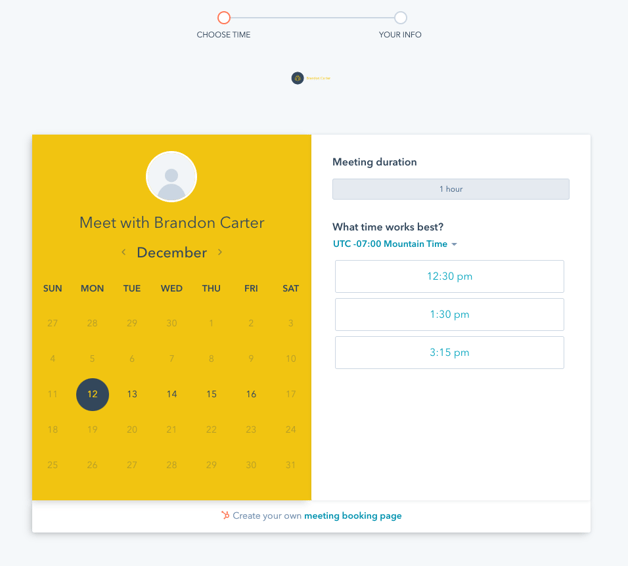
The Meetings tool isn't an essential one but I use mine all the time, so it's one of the first things I created.
This free tool allows prospects to schedule time with you directly. You can customize the length of the meeting, the location (including your free Zoom account), reminders, and even the times of the day you’re available. I like to carve out Friday afternoons for busy work, but otherwise people can schedule me pretty much anytime my calendar isn’t blocked out.
I include this link in my email signature and autoresponders from my contact form. As a free user, I'm allowed one link, but paid versions include multiple team members on an invite, round robining, and variable lengths and types.
Anyone who uses my meeting link will be added to my CRM, along with the meeting details. At this point, I’m still just ten minutes into setting things up.
Add your email to the Conversations Inbox
I use my personal Gmail for most communications but I want to be able to use my work domain for business communications. Problem is, it’s not hosted in Google or Exchange and isn't convenient to check. Plus, I want to keep those emails separate from my personal ones (so no autoforwarding to a Google inbox).
HubSpot has a tool to solve this, and it might be their most underrated tool in the system.
The Conversations Inbox is a central hub for all your business communications, including emails, chat, Facebook messenger - you can even have form submissions go directly into this tool. It’ll filter out most spam and business emails, isolating just messages you need to see and respond to - which you can do directly from within this tool.
I added my work email as a channel into the tool, which gave me instructions on how to forward my work domain emails directly into the system.
All emails sent to brandon @bscarter.com go directly into HubSpot, with CRM profiles attached. I can respond from there, schedule a meeting, fire over a document, and all of it is logged automatically.
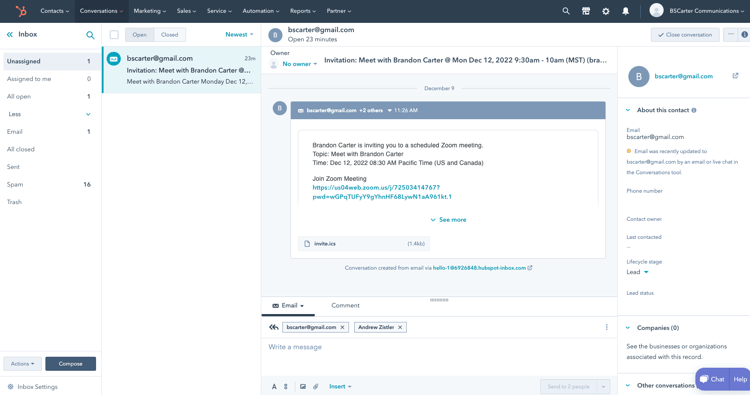
So now roughly 20 minutes in and I have a central messaging system connected to my CRM that allows me to check my email from a central interface and have all those interactions automatically map to my CRM. And I’ve still spent nothing.
Install the HubSpot Sales Extension
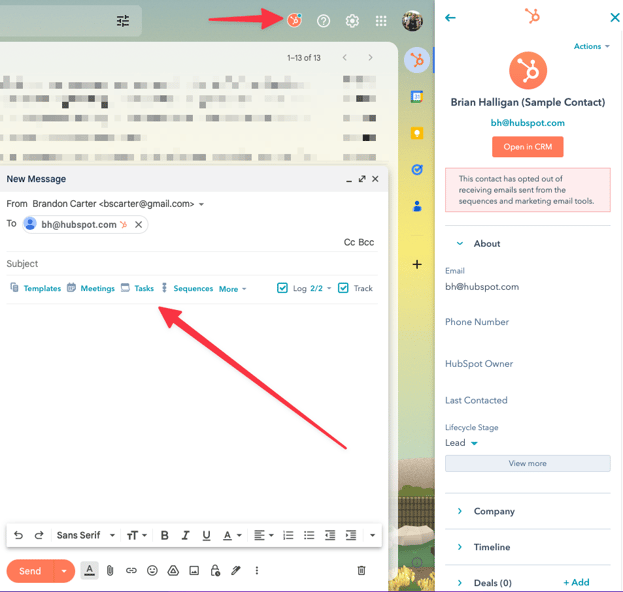
I still do a lot of business talk in my personal email, which uses Gmail, so there’s no harm in installing the free HubSpot Sales Extension. Go to the Chrome store and download it there.
First, the sales extension enables you to interact with HubSpot from your inbox. You can log all your emails to the CRM so there’s a permanent record of conversations, but you can also track emails, which sends you notifications when someone opens or clicks an email. If you’re sending an email to a new person you have the option to add them to the CRM - so don’t worry, you won’t add personal contacts such as your child’s doctor to the CRM.
There are also some other tools in here that I’ll cover later, such as Templates (you get five to use for free), Documents (again, five free), Sequences (this is a paid feature), tasks, snippets (quickly access repetitively used phrases, like your pricing or hours), tasks, and of course, quick access to your meeting link.
We’re less than an hour into this thing and we’ve already set up a living, breathing CRM that can automatically capture contacts AND your most important interactions with them.
If you have a list of your contacts in a spreadsheet or even another database, now is a good time to import them - but first you'll want to build out custom properties to make sure all your data has a place to live. I’ll cover this process in a later article.
Building Your HubSpot Website
Now is the challenging part. If you’re like me and tired of dealing with Wordpress but too cheap for Webflow or Squarespace or a better CMS (content management system), HubSpot has one that’s free and just as dynamic and easy to use as those platforms.
To get started, go to the Hubspot Marketplace and grab a theme. There are paid themes but also plenty of very nice free themes. My site is built off Outlook by Juice Tactics - Snacks. I picked it out because I liked the layout and placement of the modules.
Once you have a theme installed, you can then go to settings → Website → Themes, and from that interface you can adjust your fonts, colors, text sizes, and more. This is where your brand kit comes in handy, as those colors you designated there are easily accessible in the color picker interface.
Next, go into the the Website section and begin building out your pages. I liked Outlook’s Coming Soon page, so I customized it a bit and set it as my home page, then began the process of moving my site from Bluehost Wordpress to HubSpot.
When you feel like you’re ready you can map your domain into HubSpot. Go into the settings, then under website, select Domains & URLs. Then select Connect a domain, and tell it what domain you want to host in HubSpot. From there it’ll give you instructions on how to change the DNS settings. Changing DNS settings is easy but not something to sneeze at - luckily HubSpot will have specific instructions for your host.
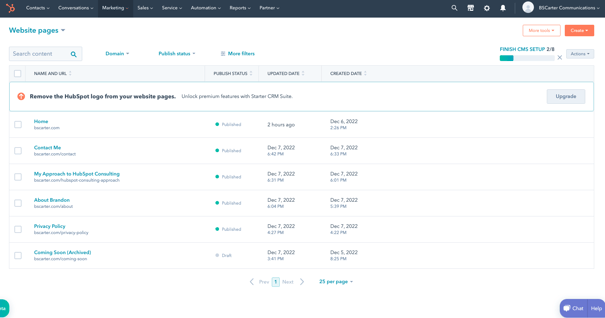
The process of mapping over could take a few hours, so while I was waiting on that I began building out my other pages. I built a home page with the minimum viable information, a contact page, an about me page, and a blog.
The Outlook theme has templates for all of these, so I stuck with their outlined templates as much as possible. I'll iterate on making it my own later; what's important right now is I have something published to help people find me.
The HubSpot free CMS will force a little floating “Built on HubSpot” button down in the lower left corner, which is the price of using a free tool. It’s not an insignificant consideration - if you’re dead set against it, there’s always Wordpress.
I kept it on mine since I’m selling HubSpot Consulting and well, it kind of looks like an endorsement.
Side note: Every site needs a Privacy Policy but most of us aren't lawyers. I used Termly.io to get a free one and by all appearances it's an impressive tool.
Forms
Before you publish anything you'll want to build out two forms: a Contact Us form so people can reach you directly, and a subscriber form so people can get your blog updates or newsletter.
The subscriber one is simple - just an email, really. Your purpose there is just to get someone in your CRM so you can drip them useful content.
I'm a little bit obsessive about knowing where people are coming from, so I built out UTM properties and added them as hidden fields on the form. I'll explain all this in a later article, but implementation is super simple. Just create the following fields (which will automatically drop them into contact profiles) and add them as hidden fields to your forms (which will include any information captured in alerts):
- UTM Medium
- UTM Source
- UTM Campaign
- UTM Content
- UTM Term
The contact us form needs to include the information most vital to begin a solid first conversation with someone. You’ll want to ask for first and last names, emails, job title, and allow for comments so they can be descriptive with why they’re contacting you.
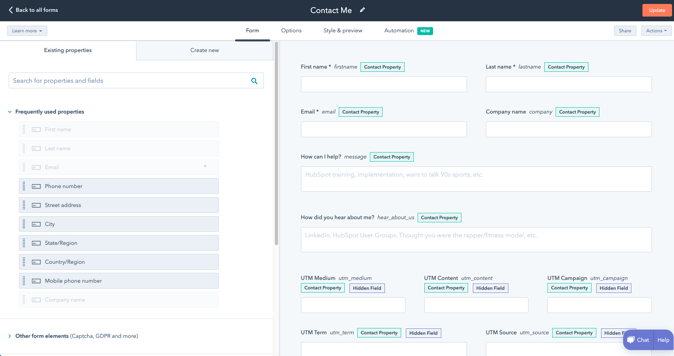
You may not have to ask for their company - if someone comes in with a corporate email address, you can have Hubspot automatically create their company and associate them with it (go to settings → Objects → Companies then click the Create and associate companies with contacts checkbox.
This won’t help you with Gmail and other freemail providers, but you can block those by going to the form editor → click on the email field → click “Block free email providers” at the bottom of the lefthand options column.
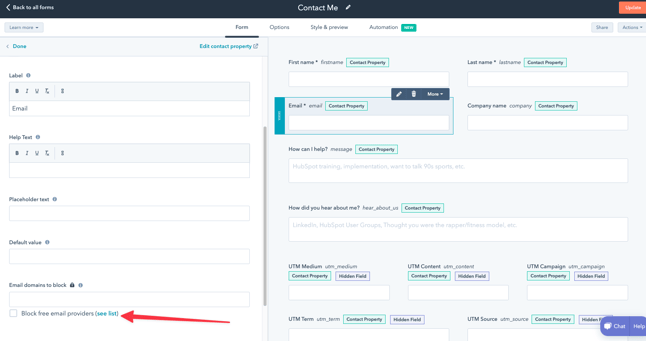
I kept Company as an option on mine since I know a lot of my potential clientele (small businesses, solopreneurs) will come in with freemails.
Finally, I want to be sure to cover my bases in regard to privacy laws, so I chose to add some language using the Other form elements section and selected GDPR Options then Legitimate Interest. This slides a little bit of language into the form that covers me, legally, in most privacy issues.
You can customize all Privacy language in Settings -> Privacy & Consent -> Consent Options. If you plan to do business in Europe, I recommend some of their more strenuous options, such as including opt-in checkboxes.
Any forms you create will be available in the HubSpot website / landing page editor interface for easy insertion.
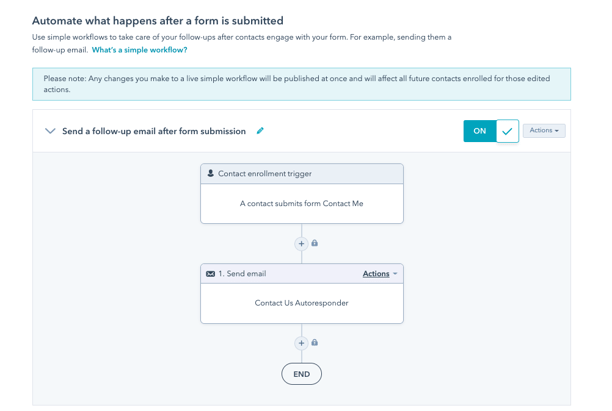
Follow-up Automation
Since I'm operating out of the free HubSpot tools I don’t have access to workflows, but I can do some basic automation on forms, including sending a follow-up email.
My process simply sends over a confirmation/thanks note and includes my meeting link. I’d rather someone just pick a time on my calendar than the two of us do the whole “find a time we’re both open” song and dance.
Of course this comes with the risk that some sales or scammy people are going to have direct access to my calendar. I solve for this by setting some limitations in my meeting link settings - namely, I need 24 hours notice before meeting with someone. This gives me time to cancel meetings or redirect someone through email if I need to.
Menu
Next I continued refining my minimum viable product website by constructing a navigation menu.
Go to settings → Website → Navigation then Create Menu. From here you can add any pages you’ve already built. You can even add placeholders for pages you haven’t built yet - just select “Add menu item” then “Add item without link.”
You can easily create dropdowns by dragging one menu item into another. Release the item and you’ll see it become indented below the item in which you dragged it. You can keep making child menu items of child menu items, but just like in real life, you shouldn’t. Make one layer of dropdowns and that’s it - any more and the site becomes difficult to navigate.
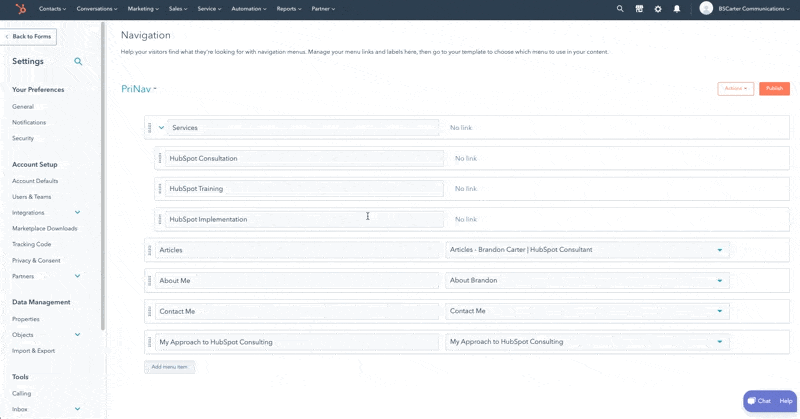
Once you’ve created a menu, it’ll be available for insertion on any menu widgets in the HubSpot website and landing page editors. I added my PriNav (Primary Navigation) menu to the header and footer of my site.
GDPR / Privacy
I've worked in marketing long enough to know that privacy law compliance is something to take seriously. Yes, those little consent notifications asking you about cookies are annoying, but they're necessary to comply with most privacy laws like GDPR. HubSpot has one of these included, so I turned it on by going to Settings -> Privacy & Consent then Cookies and activated it for all pages on my domain.
I also want to cover my bases on form submissions, so next I went to Consent Options and added "Legitimate Interest" language to all forms.
Blog
At this point we have the bare bones of a business - CRM with automated entries for people we email, a website with forms, a centralized location for messaging, and some entry points for new contacts like the meeting link and email inbox plugin. The website probably took you some time, but you’re probably still on day one.
A blog is bonus points on day one. You’ll want one at some point but it might be wise to write out a few articles first then add it in with those published so there’s some backlog.
Or you can be like me and just push it right on in, post-less and all.
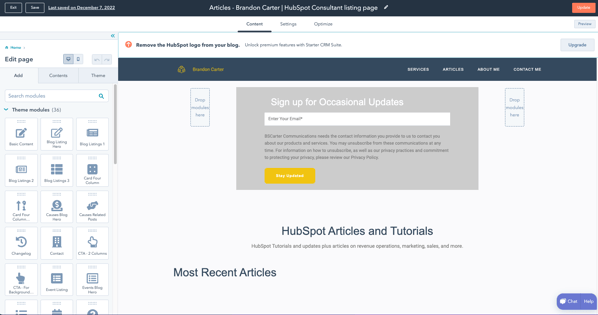
Go to Marketing → Website then blog, and from there HubSpot will prompt you to create your first blog. They’ll start you off with basics, like the title of your blog, what URL you want to use (yourwebsite.com) and which subdirectory to use (blog - so your blog will live under yourwebsite.com/blog).
Next it will prompt you to pick a theme, and the Outlook theme comes with a few. Once you’ve selected one, the next step is to write a post. Which you can do, but really the next step will be to make sure your layouts look the way you want them to.
First, select “Blog listing pages” on the left sidebar, then hit Edit. This is the landing page for your blog, where all your recent articles will be compiled. From this point it’s just like editing any other page - just keep an eye out for pre-built elements like Recent Posts and pagination, which you can customize as you see fit.
I also recommend adding a subscription form to the top of this page. I didn’t like any of the pre-built templates, so I dragged in a form element and a text box to create my own.
Blog article layouts are a bit more difficult to edit, as they often require you to go into the back-end Design Manager and either manipulate code or use the drag-and-drop layout editor, neither of which I advise if you’re not experienced. The inability to do something basic like add a “Recent Posts” menu to the sidebar without getting into code/bootstrap is actually a pretty major flaw.
But again, we’re working with free here, so we’ll just roll with it.
What I have for free and what I'll need to purchase
I'm using a fraction of what HubSpot can do, without automation, or the social tool, or advanced CRM functions, and I can only deploy a handful of emails at a time. Everything has HubSpot logos on it, even.
But that’s okay because I'm on day one and don’t need all that stuff yet. I’ll add it up as I scale but right now the complexity of some of those other tools would probably hurt more than help.
I have a place to store leads and am automatically logging most of my communications with them, plus giving them entry points like a website and forms with which they can throw themselves at us.
The money will come, but for now we just got a digital-facing business up and running in a single day.
